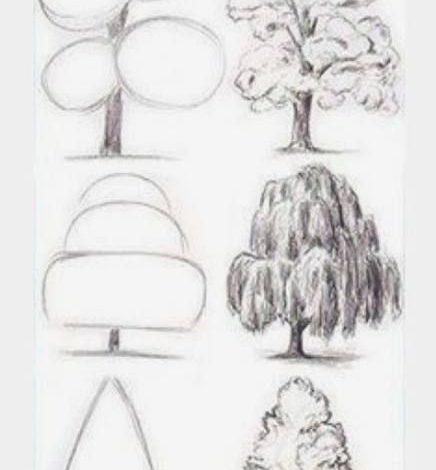
Trees Drawing
Trees are very useful in illustrations and we are going to learn tree Drawing. If only if you like to draw heroic fantasy or fairy tales, this is one of the elements that will come up very often in your illustrations. And today, as I feel you are super motivated, we will not learn to draw one, or even two, but three different species of trees! Yes Yes. And in color. A real crazy tutorial awaits us!
As you will see, it always works the same way. The rest are variations depending on the species and the season. We are therefore going to study three different kinds of trees: oak, baobab, and fir. Three trees are very different from each other. Normally you should be able to do the other types of trees yourself afterward. We can also teach your kids about school drawing from our website
DRAW AN OAK
I start with a fairly common tree: the oak. It is tall, it is leafy and it is the “classic” tree that we generally think of (in any case I immediately think of oak when I have to make a forest in Europe). We will therefore start with its structure. The trees are all more or less damn the same: a central trunk, straight or twisted, more or less thick. Then there are variations.
THE OAK TRUNK
The trunk branches out into branches more or less early, with more or less thick branches which also branch out. Next comes the foliage, usually in the form of leaves or thorns. In the case of oak, therefore, we have a fairly straight central trunk with some sort of blistering.
DRAW THE BRANCHES OF THE OAK
From there, we will start at least one large branch vertically, then others more inclined, or even completely horizontal. We are on the organic, so no need to do something regular, on the contrary. Making curves, “waves. We will be much more credible than a straight branch. From these large branches, we will make thinner branches. Again, let your imagination run wild. We, therefore, repeat the operation, adding smaller branches and ramifications.
FOLIAGE
Most of the branches will be obscured by the foliage, but it is important to draw them before properly place the foliage on top. Because the leaves grow at the end of the branches. Tree drawing Knowing this, we can therefore place them in a “cluster”. Keep in mind that there is the foliage all around the tree, so there will be foliage that goes behind certain branches that we have traced and others that will pass in front according to their position in the tree.
Placing the foliage behind
For the foliage itself, you can give it the level of detail you want. For my part, I still like to suggest things as much, so I don’t go into particular detail except in a few selected places. Do not bother to detail all the sheets one by one, the result will not necessarily be worth your effort. If you have trouble, start by placing the foliage behind the tree and then move forward Tree drawing. Always remember to work with the masses. Foliage works much the same way clouds do. Then erase the areas hidden by the foliage. Ezine posting
APPLY COLOR TO THE TREE
There, your sense of observation is very important. Take a good look at the colors. A tree does not have a “brown” trunk and “green” foliage. It’s much more subtle than that. Especially since there are variations in the colors. The trunk for example is in a very desaturated purple/brown, almost gray, and in places indeed a little more brown/greenish. So I go on the lightest shade I see. A kind of very light purple gray. Sounds weird as the color, huh? We’ll fix it right away by putting the shadows. Note that the branches at the back of the tree are darker than those at the front. I used a gray, basic, without any particular shade for the shadows.
The branches at the back
You can use a more purplish/bluish-gray to bring some light if needed, in my case, I didn’t need to use that. Do not hesitate to work on the texture of the tree a little with small dark lines (again, be subtle, we are far away, it must be very light). We move on to the foliage Tree drawing. It is the same thing I see lots of different shades. Normally, you do not necessarily see the same colors like me, already compared to your screen which modifies the colors more or less and simply because the vision of the colors is quite subjective in the end So I see an almost yellow-green, apple green, and a more bluish-green. I also put my lightest color here. I am already going to place bluish tints in places.
Actual Shading tree
Also note that according to my reference, the foliage at the front is darker than the one at the back, so I’m going to darken it a bit before moving on to the actual shading Tree drawing. I use two greens for this: a yellow-green and a bluish-green. For shadows, we use a darker green that is always bluish or yellow depending on the area we are working on. To color the foliage, depending on the style of your drawing you can stay quite vague like this.
Conclusion
The Tree drawing are almond shapes, there’s no point in detailing them one by one, but in places, it can be very interesting. I show you step by step what it can look like by detailing as you go. If you are a painter, luckily, you can take a hard brush and paint with a little water and pat on your foil. You will then have a pattern that will evoke leaves quite well (which you can then rework more classically if you wish).